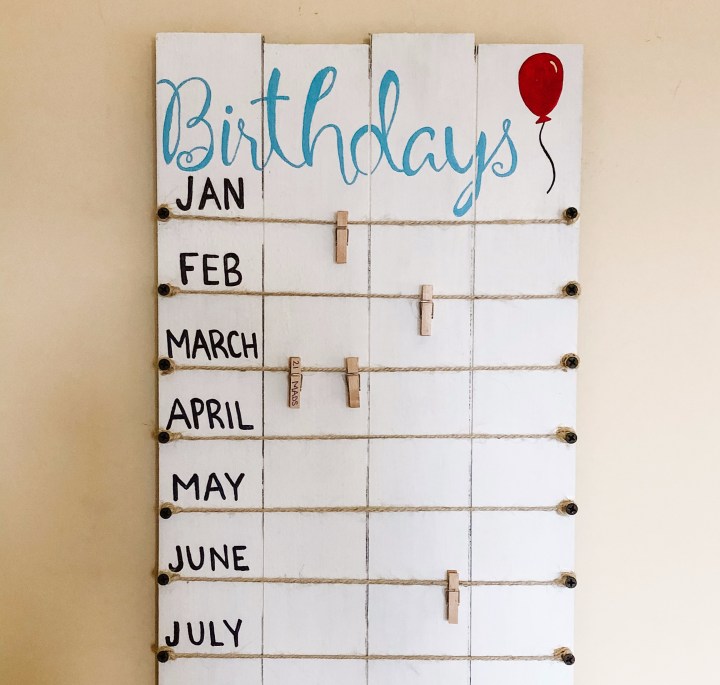
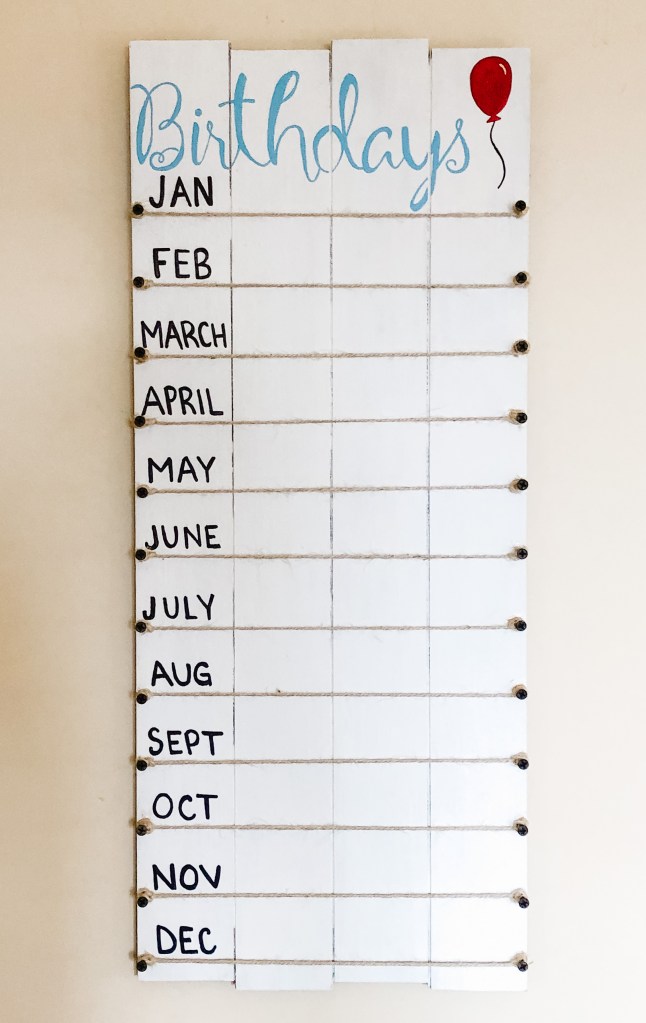
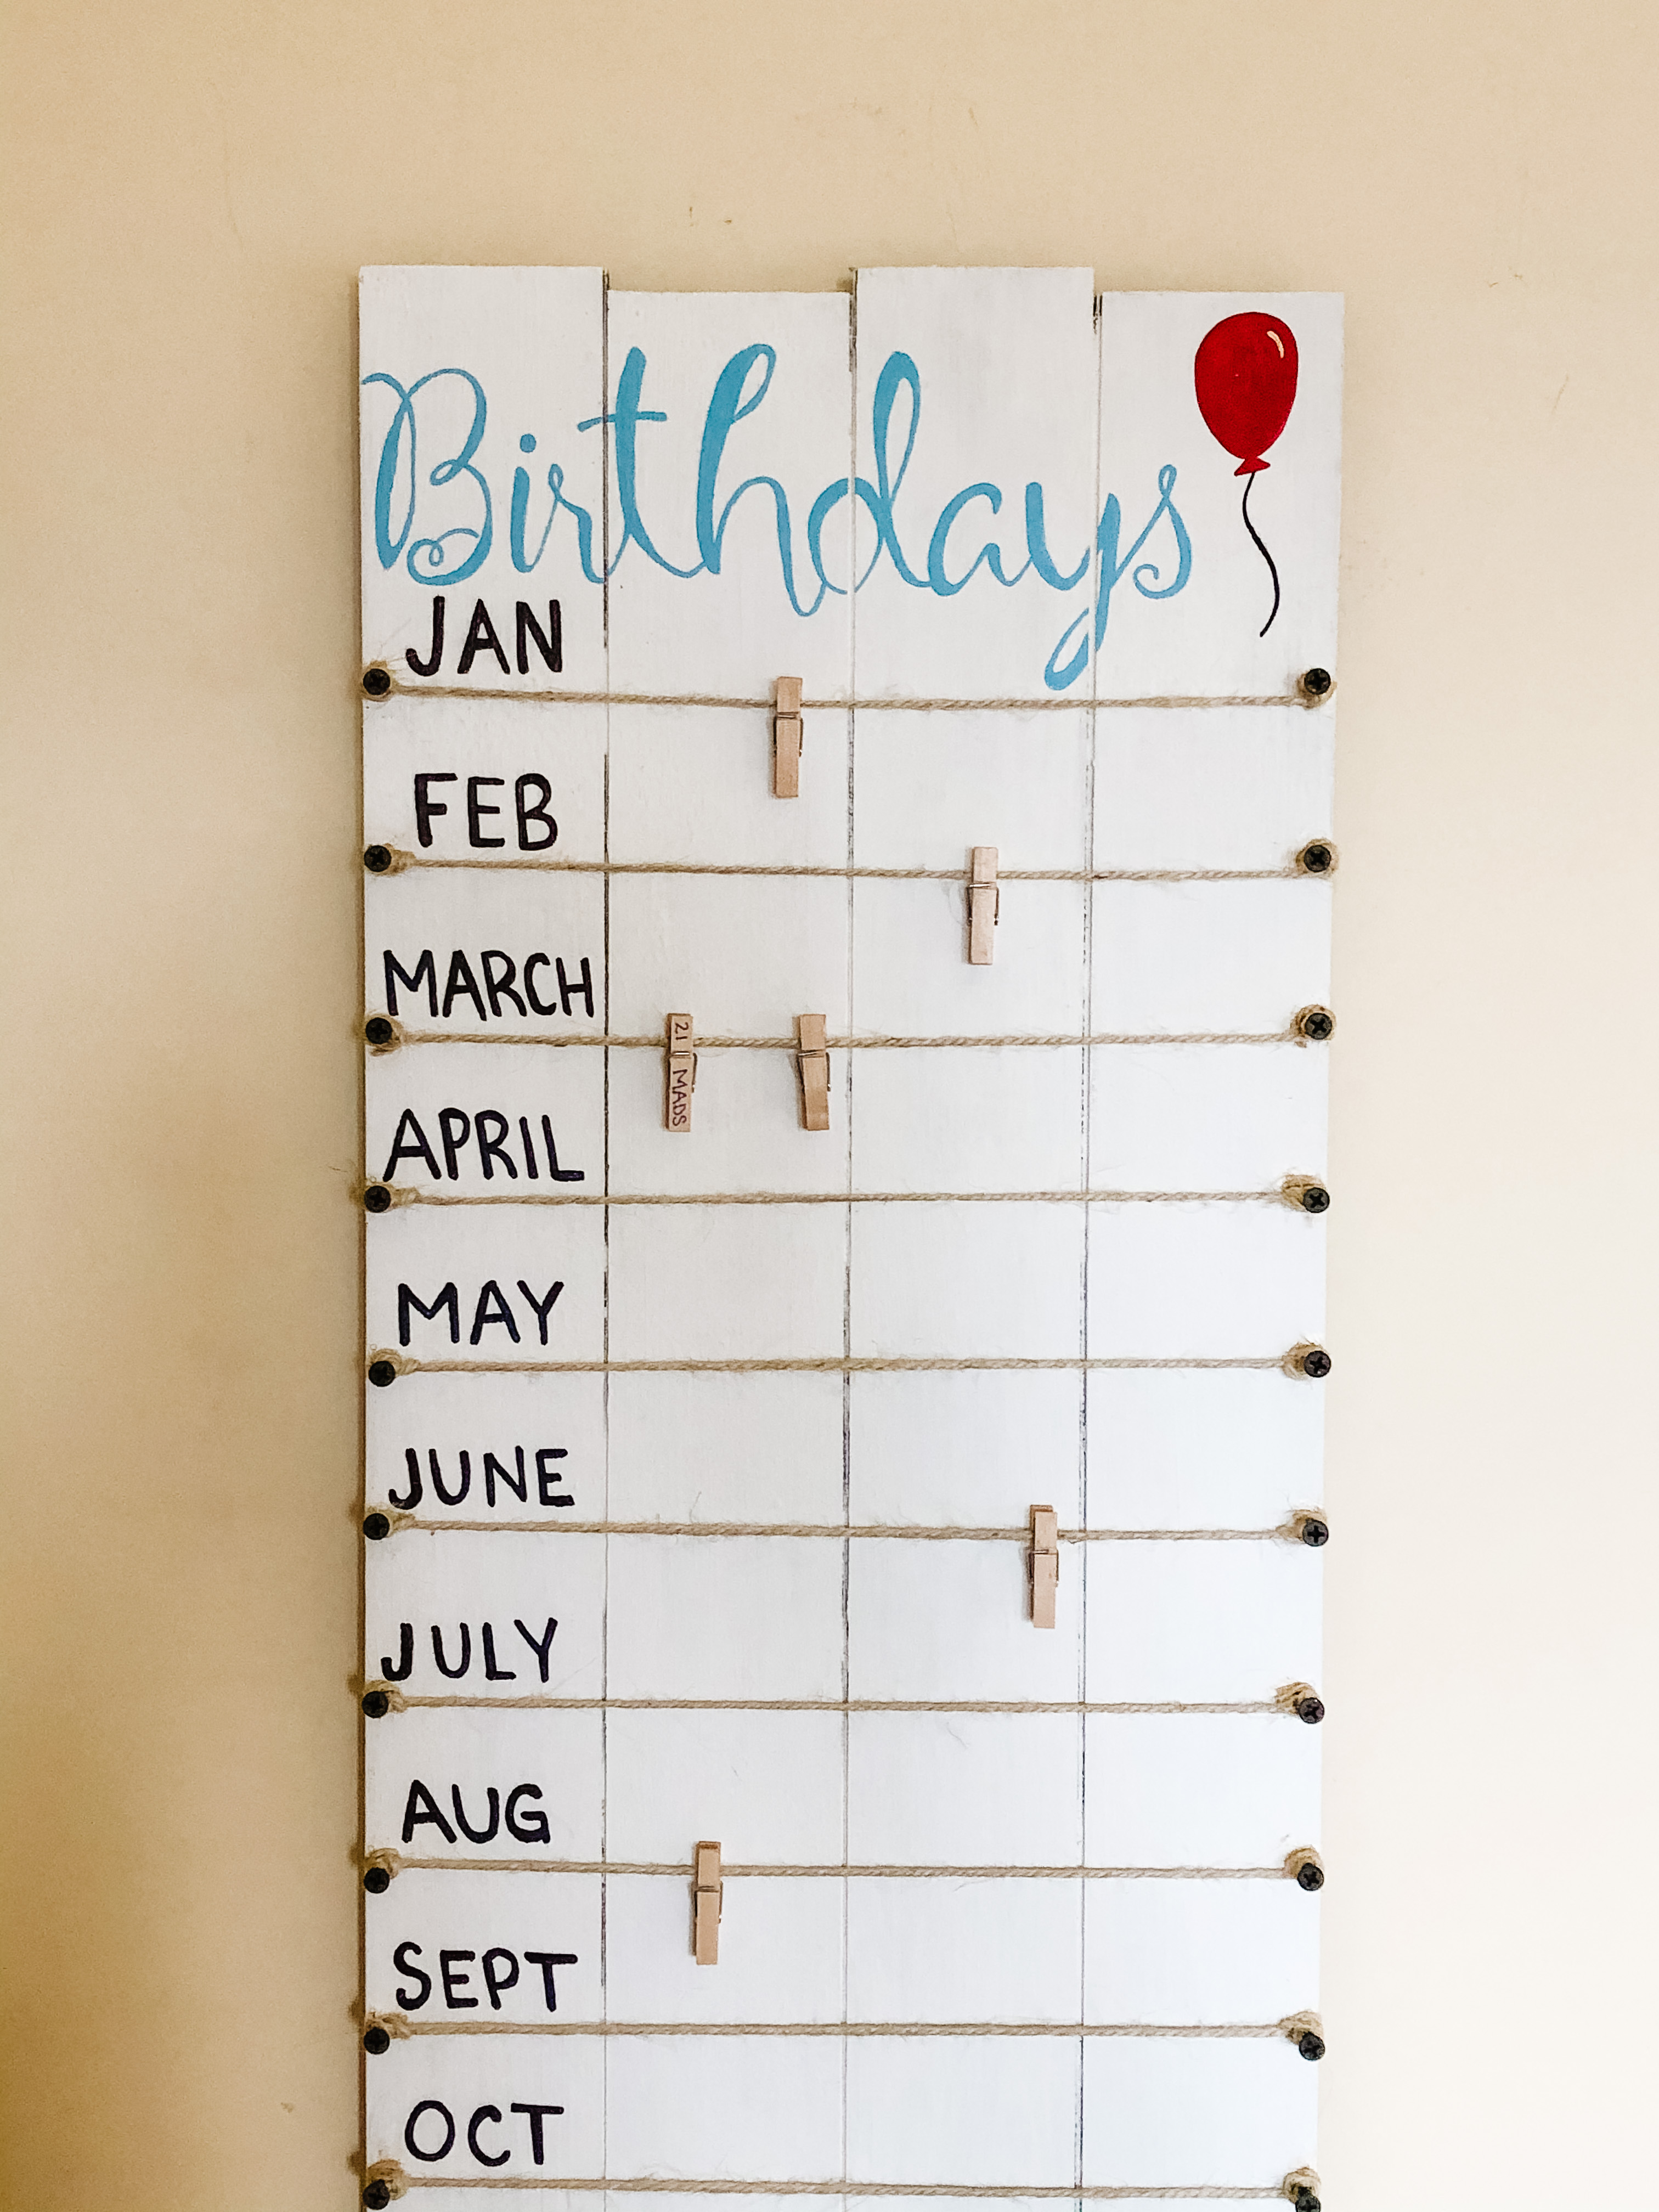
Hello! Happy Friday! Although we may not be in classrooms at the moment, we can plan and diy some new decor for when we are back. This birthday sign is a great way to list students birthdays somewhere in your classroom and for them to see their names up on wall. Let’s get started on your new piece of classroom decor!
You will need:
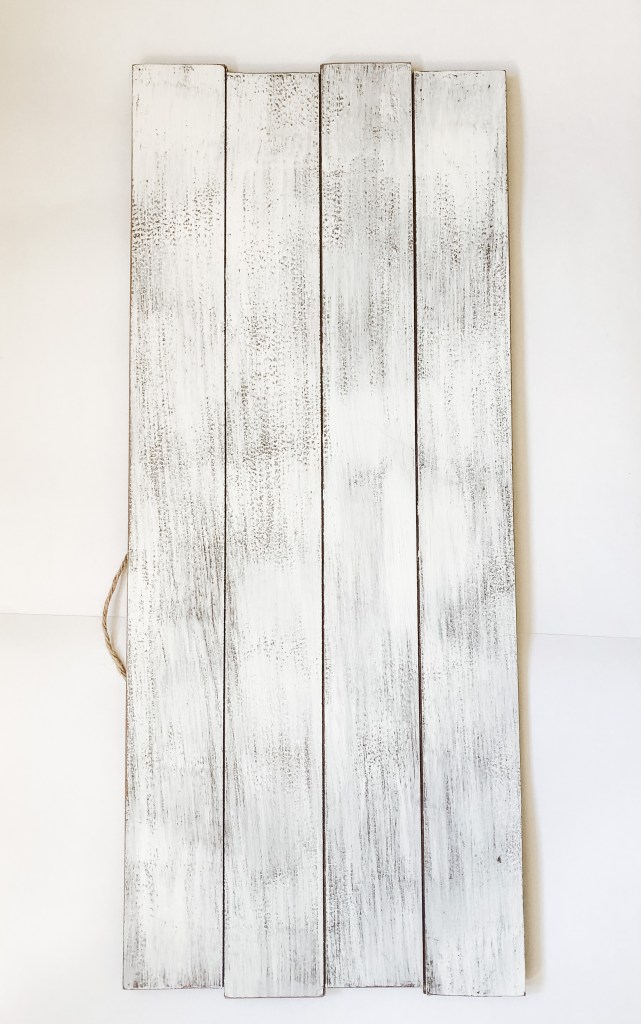
- Wooden board of some type (I had an old wood sign around, which I purchased from Michael’s a couple years ago!) I think a thick (or double layered) poster board could work too
- Acrylic Paint & Brushes
- Screws (& screwdriver)
- String
- Clothespins
- Ruler
- Pencil
- Strong glue (like wood glue, gorilla glue, super glue, etc)
I started first by painting my board all white as I didn’t love the original paint job it came with.
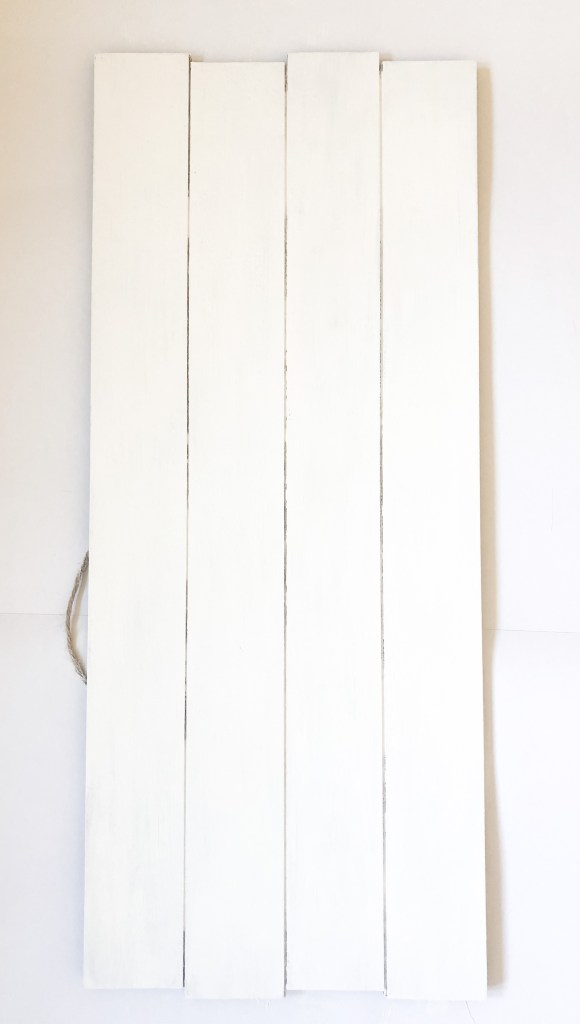
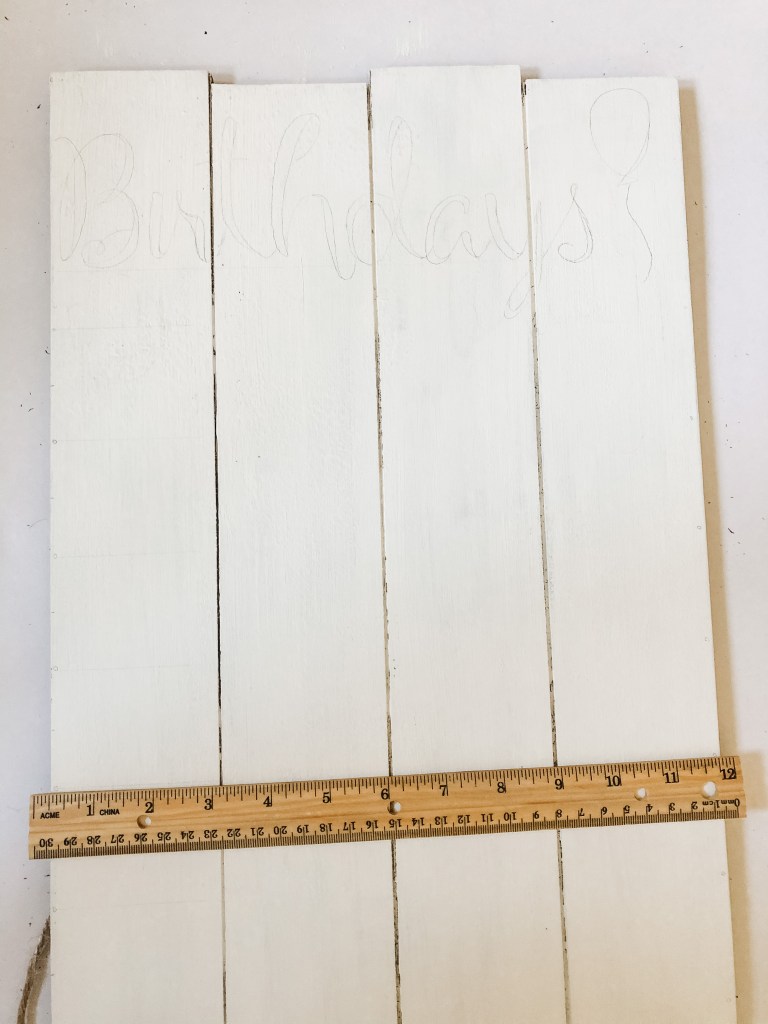
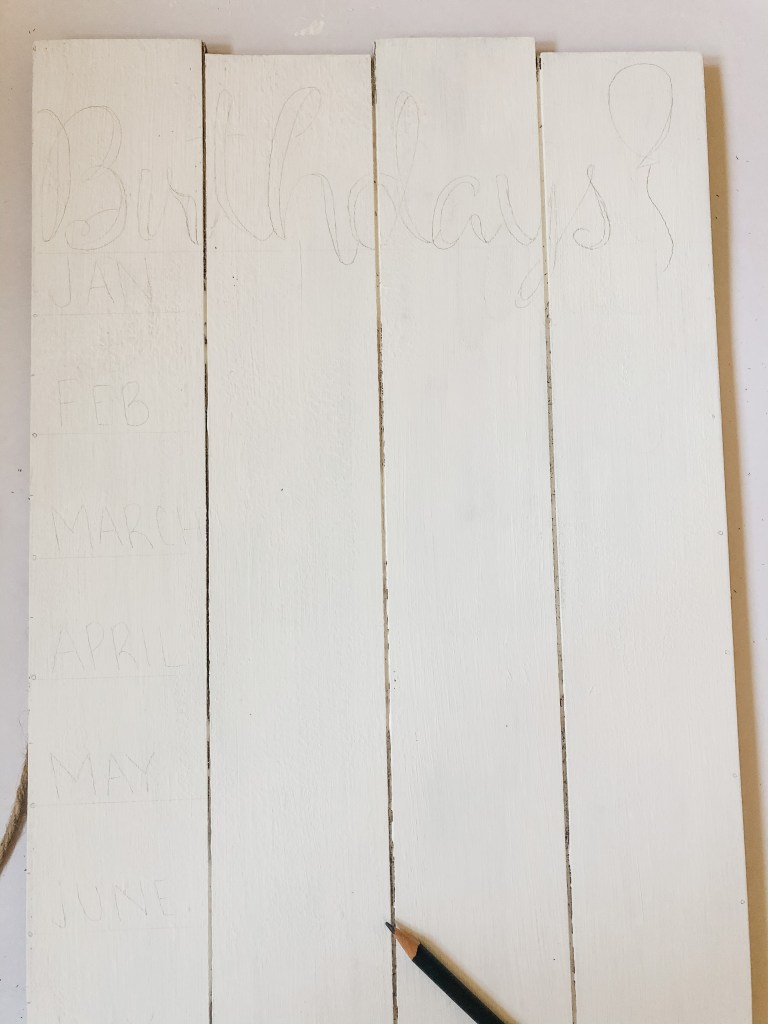
Before moving on to the next step make sure that your board is COMPLETELY DRY. In fact, I would even let it dry overnight. After dry, start to sketch out where we want everything. Using a pencil you are going to make the following marks:
- Mark out how much space you want your title to take up
- Then with the remaining area, measure the height. Divide this by 12.5 and make a slight pencil mark at each spot starting from the bottom. Then add another mark just under half between the first pencil marks. This is where you will add the screw and eventually be the line you write the months from. Let’s call this the secondary mark!
- Repeat all of these dots on left side of the board
- Then, connect the secondary dots with a ruler and lightly draw a pencil line about 25% of the way across where you would like your months to be. (This is a good check in point to make sure your lines are straight!)

Using a pencil lightly sketch out the title and each month…
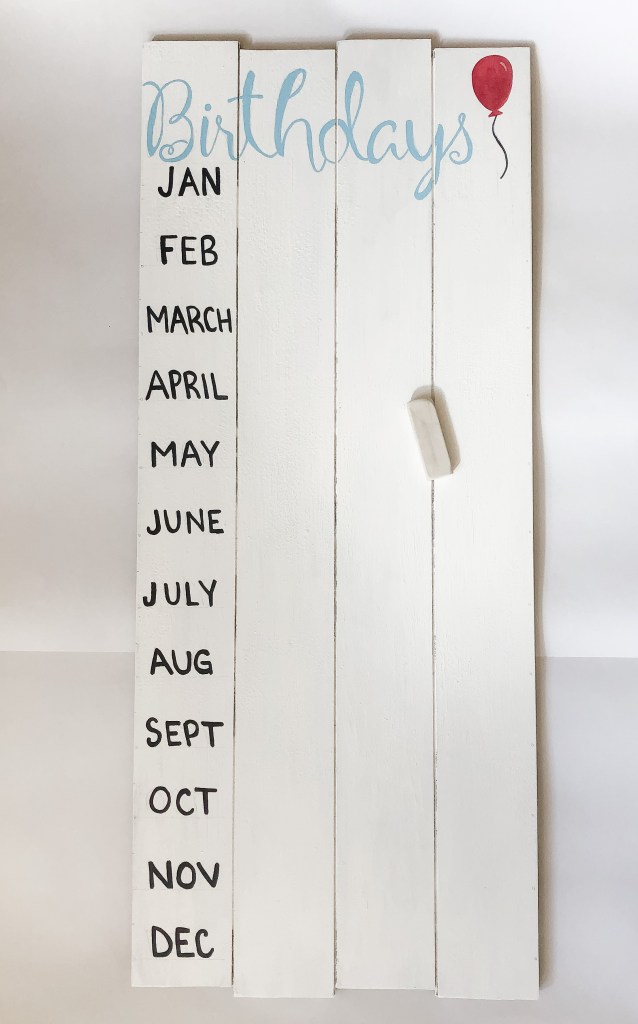
Once everything is how you would like it, go in with acrylic paint and paint over the title, months and any decorations.
When the paint is totally dry (again wait overnight), go in with an eraser and erase any lines making sure to leave the secondary marks you paced along the sides of the board.
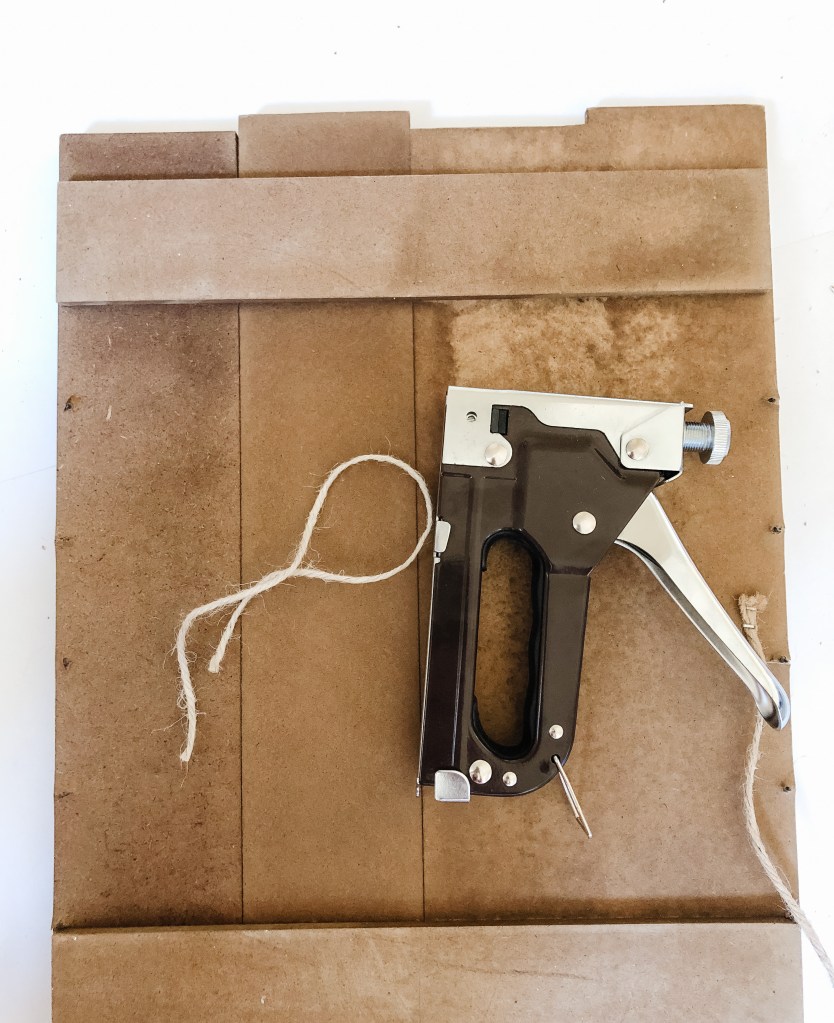
Before continuing on to the front (trust me, this makes things easier by doing this first!), flip the board over and add a way to hang the board. I used rope and a stapler to create a hanging feature at the top that will fit over a nail on my wall. You can skip this step if you don’t plan on hanging it and just leaning it up against a wall on a shelf!
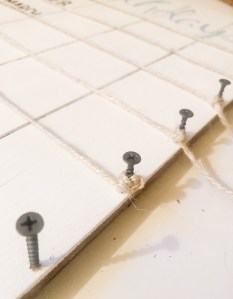
Now flip the board back over to the front. I used screws, although I’m sure nails would work fine as well. Add screws at each pencil mark where the month is written from. After the screws are in place, take your string and try it around each screw making sure the string is as tight as you can get it. Make sure to leave a little tail string on each side. We will make sure the string is tight later on as well.

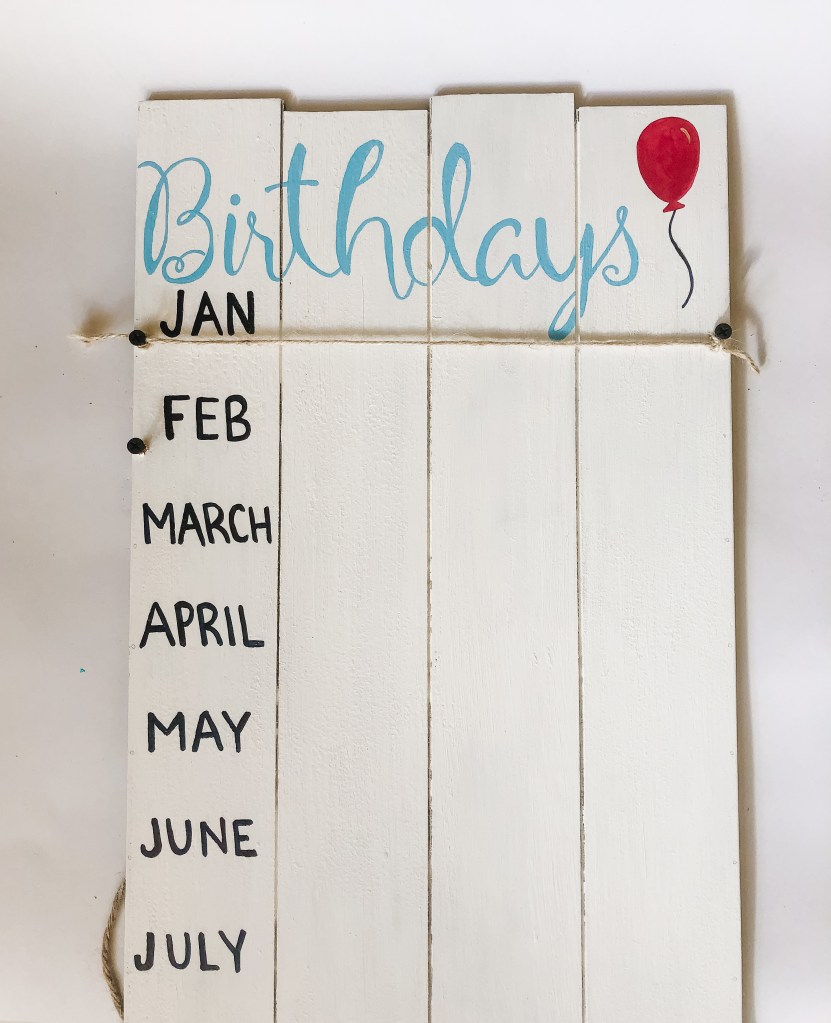
Using the glue, you will wrap the remaining tail end of the string around the screw as seen below. You can play around with this a bit to make sure the way you are wrapping the tail around is tightening the string going across the board. Do this to both sides and hold in place with gorilla glue or any other type of strong glue. Let dry completely before pulling on the string.
You birthday board is complete! Write the students name and the date they were born on a clothespin to hang at each month. You are ready to track and celebrate your classroom birthdays!
How do you keep track of your students’ birthdays?
Discover more from Love, mads
Subscribe to get the latest posts sent to your email.
